Have you ever wanted to test multiple versions of a part or drawing without the fear of ruining the original design? Well it’s possible in SOLIDWORKS, and a lot easier than it may seem.
In this video, I’ll be showing you exactly how to copy a drawing file and duplicate it for multiple projects without having to start completely from scratch. Don’t like video? View the video transcription below.
[BEGIN TRANSCRIPTION]
Hello, Eric Weber here with Alignex, and today I’ve prepared a short video that will show us how to create a new part and drawing from a part and drawing that has already been created.
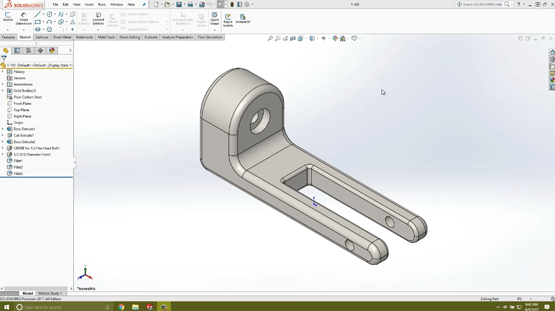
Here you will see that I have my original part file, and this part is called 1-100. I can also open up its associated drawing file and you’ll see that this link dimension is 10 inches.
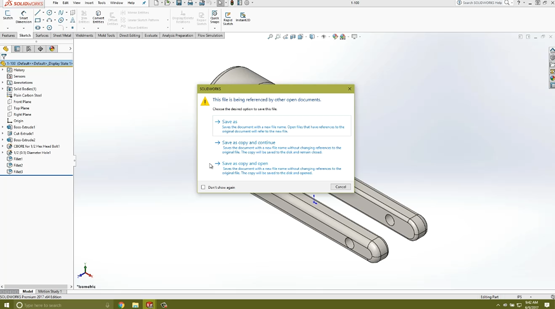
Now, jumping back to our original part file, I can go ahead and do a “save as.” When I do the “save as” I’m presented with three options. This last option is to “save as copy and open.” What this does is it allows us to save this part with a new name and will not update the references back to the original drawing.
Now I can choose that option and give our part file a new name and then I’m able to open up my sketches and make some updates to our dimensions. I’ll change this original dimension from 10 to 8, and we’ll also update the dimension of our cut from 6 to 4.
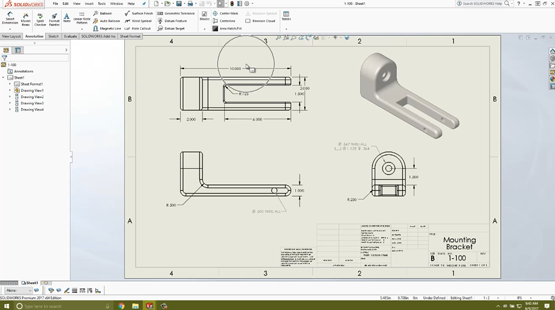
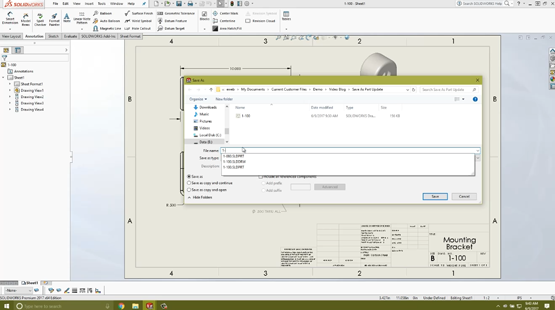
Now I can go ahead and save this new part file and then we will jump back to our original drawing. Now notice that our link dimension of 10 has not changed, because again this drawing references our original part file.
Now I can do a save as on this drawing and again give it a matching name to the new part file that we have created. Next I’m going to right click on any view and choose this “replace model” option. We want to verify that all views will be replaced and then we can go ahead and browse to our new part file.
I can open this and accept this change, and you will see that the view has changed to our new part file, however our dimensions have been dissociated. So I can go ahead and delete these dimensions, and then I will use the insert model items to update our dimensions.
After doing this, you will see that some of these dimensions need to be moved around to make a better looking drawing. We will move a few of these around, and after a few changes this looks pretty good.
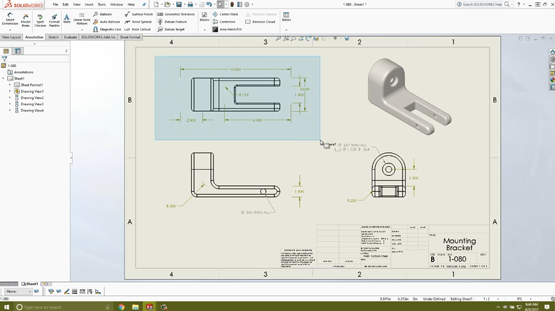
I can now go ahead and save our new drawing, and then I’ll jump back to our original part file where you will see that nothing has changed here. And then look at the associated drawing and again you will see that nothing has changed with our original drawing.
Thank you for joining me today, and hopefully that’s a nice tip for you to create a new part and drawing file from a part or drawing that is very similar.
[END TRANSCRIPTION]
And there you have it! If you are interested in learning more, check out our other Alignex support documents available on our website.

Catégories: Tips & Tricks, Usability


